Leather Banner

Leather Banner

Tuesday, October 18, 2011

Cell Phone Cover Take Two

I finally was able to put together a second cell phone cover.  This second cover came together a lot easier than the first one.  I noticed as I put the piece together I was able to pin point places where I did it better the second time because I had rushed it the first time.

Let's get started:

First I took my pattern and traced it onto the leather like I had the first time.  This pattern is fairly simple and you just need to cut along the lines and punch where the dots are placed.  The larger the dots, the larger the punch.  


I decided to try something different this time with cutting the leather.  In the past, included the previous cell phone cover, I was using a ruler to guide my cuts.  For me this was not working out very well.  Every cut I made was wavy and it just didn't look nice.  So I decided to cut free hand but take it very slow.  This actually worked really well.  If you look closely you can see in a spot or two that it was done free handed but compared to the previous attempts with a guide it was head and shoulders above them.  The key is to take it VERY SLOW.


Here are the pieces that were cut out.  I was really pleased with this result.

After I cut the pieces out it was time to punch out the holes.  The previous attempt I had waited until I had stained the piece before I punched.  I advise against that as the guide marks you made when using the pattern will be covered up by the stain.  By punching out the holes now you can use the guide marks and if you did your pattern transfer properly you don't have to worry about the holes being off.  I used my standard drive punch:

After I punched the holes I tooled the piece.  I did the same Apple Logo along with a border, cut by a swivel knife, on the main piece and the four small pieces that hold the piece together.

(NOTE: This is in regards to the first cell phone cover I made before.  Here is where I screwed up the last time.  As I mentioned before I hadn't punched the holes yet in the previous attempt and I stopped for the night.  I should have stained the piece before I left it, not to mention punching the holes.  But I didn't.  So when I sat down the next night the first thing I had to do was stain the piece.  BAD IDEA.  If your first order of business when sitting down to work on a piece is to stain it, then understand that you will probably be doing that and only that on that day.  Always try to set up your work day to have staining being the last thing you do.  If it can't be avoided then just accept the fact that you will stain the piece and come back to it on another day.  It is possible for stain to dry in an hour or two but I do not recommend moving onto the next step until it has dried for at least six to seven hours.  It may feel dry but it may still be wet inside.  And as you work with the leather the wet part will surface, get on your hands, and smudge the top.  It doesn't hurt anything to just walk away and come back later.  I didn't do this on my first cell phone cover attempt.  I stained it, waited an hour, then started to punch the holes, lace, and rivet the piece.  This is a big reason why I wasn't 100% satisfied with the outcome.  This showed me that it is very important to plan out your project steps.  Don't just blindly dive into a project without thinking it through first.  I won't make this mistake again. )
On my second cell phone cover I stained the piece BEFORE I walked away for the evening.  I used the same stain.  After it sat for an hour I stained the underside of the main piece and the four small pieces.  It was at this point I let it sit for the night.  


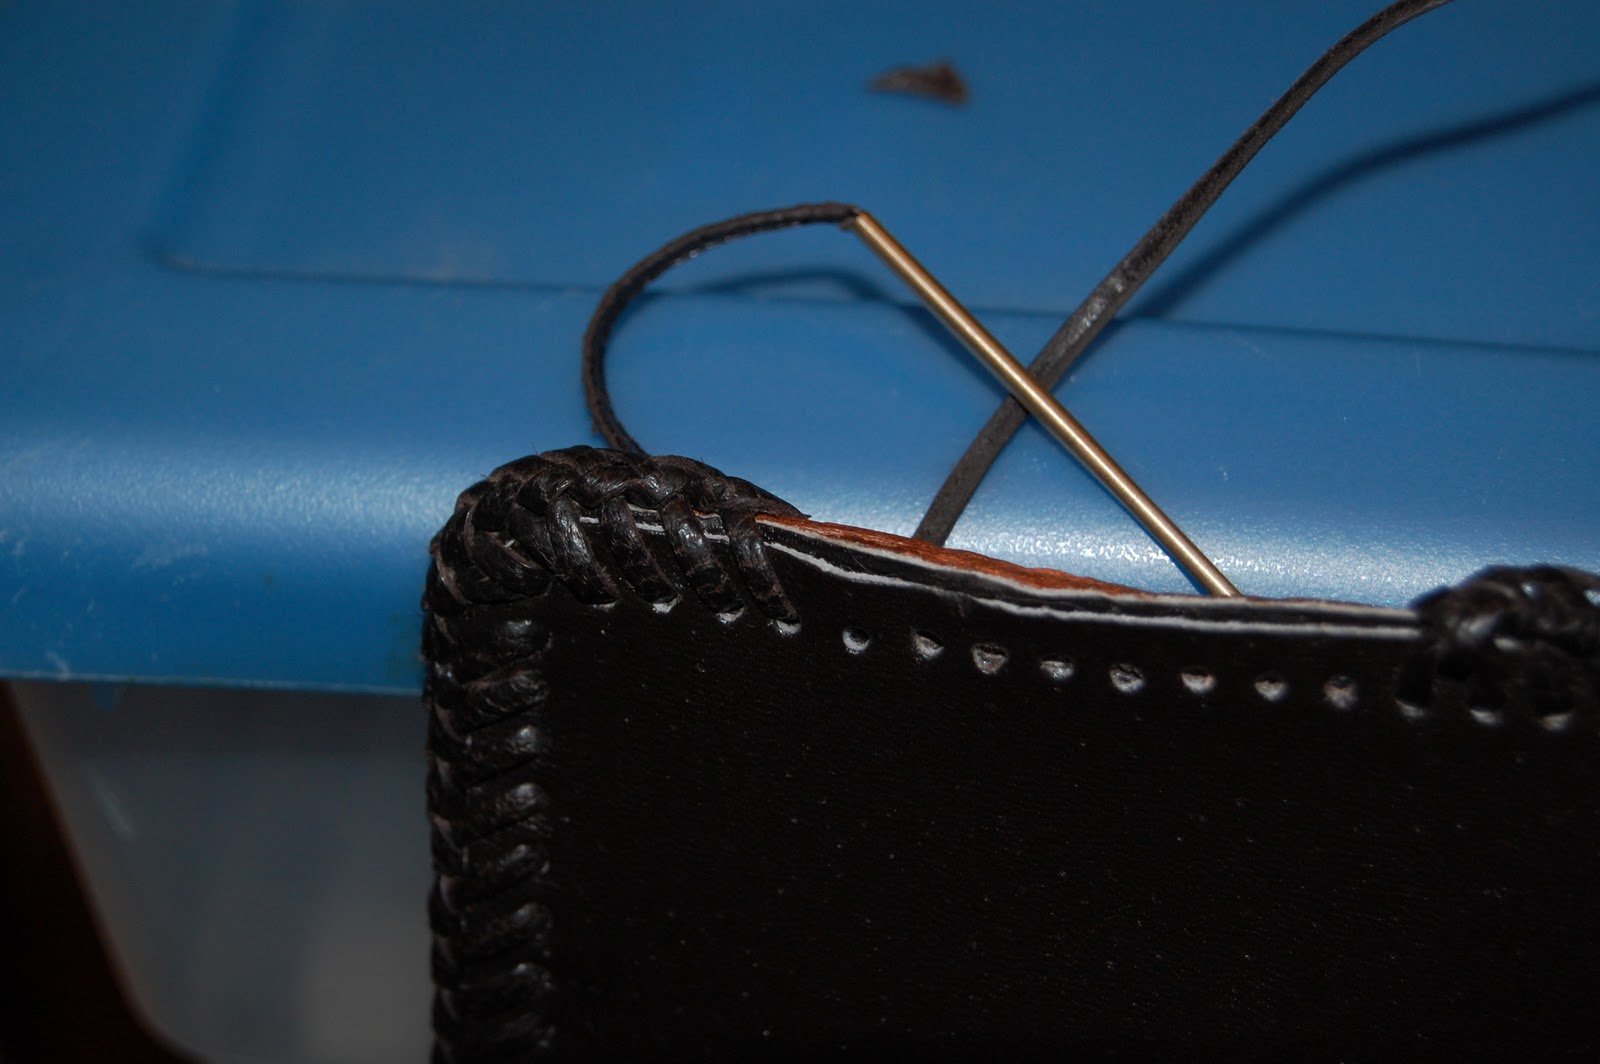
Now, because all the punching had been finished, I could jump right to the lacing when I came back the next day.  This time I started with the thin strip flesh to flesh with the main piece and laced the piece together like so:  

(You will see why I did this in a moment.) Here is what it looks like finished:


As you can see below I then flipped the thin strip over and it started the belt loop:


After lacing the second part the belt loop was finished.  I just continued to lace the rest of the piece.  (I was using saddle stitch by the way.)

While I was punching the holes I followed the pattern to a "T" which wasn't good because I wanted to make this piece a little more compact than the pattern calls for.  I wasn't thinking and accidentally punched a hole where there was not supposed to be a hole.  You can see it below:


After I cursed a few times, I came up with an idea.  I put a rivet there and it looks really nice:


Here is the piece fully laced but before riveting.


I put the rivets in and finished off with the snap and that was all she wrote:


I was really happy with this outcome.  It fits the phone very well and I like it very much.  It is over on the store if anyone is interested.  I'm working on some new projects now.  I'll have those posted as soon as I can.  As always, drop me a line if you have any questions or comments.  Thanks!

Happy Crafting!

Wednesday, October 12, 2011

Stitching Projects Part Three: Saddle Stitch

This is our next installment of our stitching series.  Today we are going to talk about the Saddle Stitch.  It is probably one of the simplest stitches you can do.  What makes it great is that, assuming you are using quality thread or lace, is one of the strongest stitches in the world.  (Again assuming you are using quality products.)

You take a piece of lace, about 1 1/2 length of the distance you will be lacing.  (Example: Your project has holes punched that add up to about one foot in length.  You will need one and half feet of lace.)  You should be using a quality waxed lace that is good for this type of lacing.  Take two needles (you will need this type of needle for the job).  The way you attach the lace is quite simple.  Thread the needle with the lace . . .


 then push the needle through the lace (puncture the lace about half an inch away from the end of the lace) . . .

 and pull the needle through.  It will attach to the end.


Do this on both sides of your lace.


Pull the needle through the first hole and pull the lace about half way through.


Then you push the left needle through the "outside" of the leather to the "inside."


Next you pull the right needle (through the same hole the left needle came through) through the "inside" hole to the "outside" hole.


Repeat.  (It doesn't matter which side you start with just as long as both needles are going through each hole.  You are making a type of a figure 8 with the lace.)


 When you reach the end of the lacing just back stitch about two or three holes  . . .


then you tie the ends of the lace . . .


pull it tight . . .


then cut the ends off.  


Your done.  (Told you it was easy.)  I do want to caution you to try not to split the lace as with the needle as you go.)  

I originally was going to do this series in three parts but I have decided to add a fourth part as I have not used the final method yet and I don't feel comfortable talking about a sewing method until I have used it.  It will be using the sewing awl.  My next project, after the cell phone, will probably use it so I will update you then.  That's all for now.

Until next time, Happy Crafting!

Friday, October 7, 2011

Cell Phone Cover

About a month ago I found a pattern for a cell phone cover that I liked.  I decided to give it a try.  I cut out the leather and put a design on it.  I decided to put the "Apple" logo on the outside of the piece.  This was due to the announcement of the iPhone 4S but it remained relevant when the news of Steve Jobs passing hit the wire. I found out right after I finished tooling the piece.  Anyway, I then punched the appropriate holes, stained the piece, and used a saddle stitch to finish it off.  (I will be posting the saddle stitch entry soon.)

Finally I riveted the pieces together and added the snap.  When I was surveying my work I realized I rushed it. This is not my favorite piece and I'm disappointed that didn't take the time to finish it properly.  I know exactly what happened.  I finished this piece over the course of two evenings.  At the end of the first evening I had gotten so far with the piece I realized that I would only need an hour or so to finish it.  This meant this project was only about a three hour project from start to finish.  (Not counting drying time for the stain.)  So I went to bed then the next day I started to work on it again.  Because I thought I was so close to the end I rushed the final bits, especially the riveting and the snap, that when I was done and I wasn't happy.  I will be doing another one of these projects but I wanted to put this up as a cautionary tale to those who want to rush things.  (It is obvious that I am one of them) Don't do it.  Take your time.

I will be putting this on the store but it will be a bargain buy.  I cannot charge what I normally would.  If I had taken my time I may have been able to sell this item for twice what I'm selling it for now.  All because I couldn't slow down, maybe take another day to work on it.

I will update you with a finished photo when I upload it.  I'm going to be making another one of these very soon and I will go through each step and explain what I did wrong with this piece versus the one I will be currently making.  It's a little more work but I think it is worth it so you can see how not to do leather craft.

That's all for now.  Happy Crafting!

Thursday, October 6, 2011

Three Ring Binder Part II


Now that I have completed the tooling of my three ring binder I am going to move onto staining and assembling the piece.  One thing to remember, if you are going to mark the leather with guide markers for the holes for stitching, do this before you stain.  I did not but it wasn't the end of the world as I wanted to use double loop stitch anyway.  So I stained the piece and let it dry.  Before I put this piece together I need to shape it so it will go together properly.  (Unlike the journal entry this piece could be shaped before you punch the holes or after.  The important part is I waited until I was one tooling before I shaped it.)  The instructions called for a "V" gouge to cut a groove into the flesh of the back cover.  I do not have this piece so I used my swivel knife instead.  Basically I found the exact center of the back cover and drew a line on the back using my t square.  Then I measured an inch from center on both sides and drew a line for each.


Now I just wet the leather and cut with my swivel knife on the outside lines.  The instructions also call for a bone folder which I do not have either.  (I must say I don't really find it very useful as I just use my t square or something rigid to shape my pieces.  If anyone out there using a bone folder and swears by them please drop me a line and give me your take.)


Now it is time to assemble.  In the kit there were three cardboard pieces that are to be placed between the lining and outside cover to give the the piece a rigid back.  Using rubber cement I glued these to the flesh side of the leather.  There are two larger pieces that go on the each side and small thin one for the spine.  After they set for a few minutes I then cemented the other side and the flesh side of the lining and placed it on top.  The instructions go into a complicated way to do this last step but I decided to do it my own way.  I slowly rolled the lining onto the piece and made sure all grooves were lined.  After an initial goof I reapplied and it worked wonderfully.  Finally I glued the pocket on in the appropriate place.  Time to let it dry.

After letting the cement set I placed some bulldog clips on the piece to be sure it will hold.  (If you do this be sure to put a folded paper towel under the clip on the tooled side so it doesn't mark up the leather.)  On to punching the holes.  Using my 1/8 punch I stropped it and punched four corner holes.  Then I moved to my four prong 1/8 punch.  This made the punching easy.  I went around the edged eyeballing the line keeping it as straight as possible.


 When I would get to a corner I would re position the punch so it would not mess up the corner hole.  (If you are off a little here it isn't a big deal.  Especially if you are doing a double loop stitch.)  When you cover the rest of the edge you are ready to stitch.


I finished this off with a double loop stitch and I think it turned out great.  I really like this piece and will have a really hard time letting it go.  I'm glad I still have the design to work with so I can make more of these on different items.

That's all for now.  I'm working on a cell phone cover now.  I think you will like my design.  I had originally intended for it to be in the spirit of iPhone 4S announcement but the passing of Steve Jobs overshadows that.   We are able to do the things we do today on computers because of him and his revolutionary ideas.  It was almost two years ago when I picked up my iPhone for the first time having never owned an Apple product before.  It has changed my life.  The way I interact with the world has been fundamentally changed because of Apple.  I realize I'm repeating what countless others are saying, and I'm sure they are saying it more eloquently than I, but I still feel I need to say it.  

I hope you have found peace Mr. Jobs.  iThank You.

Thanks for reading and until next time, Happy Crafting!

Tuesday, October 4, 2011

Three Ring Binder - Part I

Many years ago I did a lot of community theatre.  A lot.  Throughout those years I had always wanted to create a scrapbook of sorts that had all of the playbills from all of the shows I took part.  During this time I came across a sale of a three ring binder leather craft kit.  I snapped that up and started to make my plans to tool that cover and get it ready for all the playbills.  It was never to be.  Every time I sat down with the cover to work up a design I would come up blank.  (This was mostly due to my attempt at keeping the theme within theatre.)  It had never occurred to me to try something else instead of a theatre theme.  So eventually I just stuck it with my leather stuff and worked on other projects.  When it came time to open our shop on Etsy last year, I had every intention of putting something on that notebook and selling it.  But I kept forgetting that I had it.  Not to mention I did not have all the right tools to complete the project to my liking.

Fast forward to this year.  We reopened the shop and I finally picked up the cover and started to think seriously about what I would design.  Now that I had broadened my horizons beyond just a theatrical design inspiration came pretty quickly.  Recently I have seen a lot of "tree of life" imagery and decided I wanted to incorporate that into the design.  While looking over the internet for the right tree to stand in for my tree of life I remembered that one of my favorite shows, Carnivale, incorporated a tree into it's symbolism.  In actuality the tree in Carnivale is the "Tree of Usher" and is the location of the final showdown between good and evil.  (At least it was for the climax of season 2 before the show got canned.  Damn HBO.)  Anyway I drew up a design of the tree that I really liked.  The problem was I have a lot of real estate to cover with this notebook.  The tree would take up about half of the front and that is all so I had to have some more.  I briefly thought to have "Management: KEEP OUT" underneath the tree, which fans of the show would have appreciated, but I decided against it.  For another time then.  But the show did feature tarot cards as a fairly large part of the plot. So I found a sun and moon and have incorporated them into the design.


As you can see the tree is on the front with the sun above it while the moon is on the back.  Both the front and back are surrounded by an arch.  I really like this design for many reasons.  It hints at a favorite show of mine while appealing to much larger audience.  I keep the design simple in that I only cut using my swivel knife and then I beveled with my small bevel tool to get into the small creases of the tree.  (I used my large bevel tool for the arch that surrounded the front and the back.  It made the job quicker.)  After I finished beveling I did some decorative cuts and that was all she wrote.  Now this is ready to stain and stitch.  

As you can see the piece does not have pre-punched holes around the edges.  The next entry I will go over how I did that and how I put the whole thing together.  

Until then, Happy Crafting!

Tuesday, September 27, 2011

A Journal Cover Part II

We're back to the journal cover.  After the first night I skived the spine again and began tooling.


I decided to do a Celtic knot design around the edge with the "Triforce" from the video game "Zelda" in the center.  I really like the look of Celtic designs on leather.  You will find I do a lot of Celtic design in my work.  The only problem with these designs is that they are time consuming.  There is a lot of cutting and beveling involved.  But if you take your time it will look great.  Another thing about Celtic designs is that they are forgiving to mistakes.  If your lines don't match up perfectly or the widths of the lines are off it won't matter in the end.  After you cut and bevel all of the pieces it won't be as apparent.


This project called for the basic swivel knife cutting, and then beveling of the project.  One thing that is important, especially with Celtic designs is that you have bevel in order.  You need to find what would be the "lowest" point and then bevel those parts first.  Then working your way "up" bevel the next "lowest" point and so on.  You can ignore this but your design just won't look right.  While Celtic designs are forgiving to imperfect cuts it is not forgiving to poor beveling.  After I finished beveling I decided to use the background tool to fill in the space between the lines of my knot.  I'm glad I did this at it really gave the whole piece some more depth.    


When the tooling was finished I wet formed the leather to the book again to ensure it was shaped properly to the book.  As I mentioned in the previous entry, this step should have not happened until after I was done tooling and punching the holes.  Because I had to have flatten the piece out again only to have to wet form for a third time.  We learn as we go!

I finished off the piece with a cherry stain.  I really like this stain as it gives the leather an almost wooden look.
 

After that it is just a matter of using rubber cement to glue the lining leather to main piece of leather.  The large lining piece was cemented completely while the pockets were only glued along the very edge.  I let the piece sit over night so the cement would stick.  The next day I sat down and got ready to punch some holes.  Because I put the design so close to the edge, and I had to use a large hole punch, I had to be very careful.

I use a set of punches that screw onto a handle that is punched with the mallet.  You can also use a prong punch or a rotary punch.  I like the punch set because it gives you a lot of options and is the easiest in terms of stamina.  (The prong punch would be easier but it only does one size while punching four holes at a time.)

First I stropped my punch.  (Take some jewelers rouge and a small scrap piece of leather and rub the rouge on the flesh side of the leather.  Then take your punch and slide it at the angle of the blade of the punch while spinning the punch around.  Then take some beeswax and put the punch in the wax.  Doing this will make the punching go so much easier.)  I then began to punch.  You want to try and keep it as straight as possible.  The good news is that if you are doing a double loop stitch it won't be such a huge issue but it still is a good idea to keep it as straight as you can.  Punch away.  Every now and again strop and re wax the punch.

When I was finished I used a suede lace to finish it off with a double loop stitch.  After putting the journal into the cover I was really pleased with this project.  This marked the first project that I put together entirely from the scratch.  (I have put things together without the benefit of a kit but I always used a premade pattern.)  Here I did everything, pattern all the way to finish, from scratch.

Let me know what you think.


theslackjaw@gmail.com

Happy Crafting!


Monday, September 26, 2011

Stitching Project Part Two: Double Loop Stitch

Here we are at part two of our stitching series.  Today we are going to discuss the Double Loop Stitch.  This is the stitch that I have used the most in my leather craft projects.  It sounds complicated at first but after a while it becomes really easy to understand and do properly.  The most important thing to remember is to make sure the lace does not "kink" as you go.  You just need to make sure the finished side of the lace is always facing up when the lace is pulled tight.


You start the stitch by pulling the lace through the "outside" hole and then looping it through the next hole like you are starting the basic loop stitch.


BUT before you pull the stitch tight put the excess lace through the loop you are about to pull to create X when you pull the loop tight.  (NOTE: Do not pull this too tight.  We need it to be a bit loose.)


Now you are going to put the needle under that X you created and pull the lace through and pull the stitch tight.  (This one can be a bit tighter, except when we get to the corners, you will see why.)


  Then pull the needle through the next hole and pull it through.  You will see that it has created another X, to which you will pull the needle up through and repeat.


When you reach a corner things get a little tricky.  Basically you need to stitch twice over again on each corner hole.  Any "official" double loop stitch directions may say three stitches per corner hole but I think that is a bit overkill.  Two stitches per corner hole should be fine.  Basically you pull the needle through the hole like you normally would, pull up through the X like normal, then pull it through the same hole again.  Pull it through the X like normal, THEN you can move to the next hole.  Repeat with the rest of the holes on the corner.  It isn't really that tricky when you think about it but it can be hard to do as sometimes the holes may not be able to fit the lace.  In these cases you can use an awl and try to widen the hole a bit.  (Or if you have a pen or something pointy to stick in the hole to widen it . . . Doug, I hear you snickering in the back . . .quit it.)

Finishing and splicing the double loop stitch is a little tricky.  To this day I have to refer to my directions to get it right.  (It makes sense because it is something you only do once or twice a project and if you only do a few projects a year you can forget it easily.)  Because I'm working with leather more it is beginning to stick.

Splicing, actually, is very easy.  You just put the needle between the leathers and pull it through on the "outside" of the project.


You do this about three or four holes away from where you were previously stitching.  Continue with the "old" lace until you get to the "inside" hole that matches the "outside" hole you pulled the new lace through.


You pull the old lace up between the leathers then cut off the excess.  Tuck it between the leathers and continue with the new lace.  Simple really.

Finishing off the stitching is where it can get tricky.  When you reach the end you need to stop about four holes from the end.


Using an awl or your needle you need to pull the excess lace from the begining of the stitch out from under the lace.  (This is the excess you folded under the loop to create the "X".)


Then pull it through the hole and then down again through a loop that has been created.  Now you should have this loop and the excess lace coming from hole in the leather. Pull this excess up between the leathers and cut the extra and tuck it back down.


Now continue to lace like normal.  Eventually you will end up pulling the lace through a hole and it will leave you with a hole on the inside but no other hole on the outside. Here you take the lace and pull it up through that loop that is hanging from the beginning of the lace and then pull it through the last "X" you created with the end of the lace.


Do not pull that stitch tight!  Now pull the lace back down through that loop, again not pulling it tight yet.  Now you need to push the two ends as close together as possible.


After you are satisfied that you have closed the gap as well as you can you pull the stitches tight and then pull the lace through the last hole on the inside and up between the leathers through the stitching and pull it tight.


Cut the excess lace and tuck it down.  You are now finished.


I know that last bit is complicated and I tried to put in as many pictures as I could to illustrate.  If you have any questions please do not hesitate to contact me at:

theslackjaw@gmail.com

That's all I have for today.  I have a few new projects on the horizon after I finish these past few and I can't wait to show them to you.  Until then, Happy Crafting!